
It all started with DGR 2015
When a friend told me about the DGR and asked me to get registered and participate in the ride with him. He has a nice collection of vintage bikes which I didn’t use to like in past. I dedicate this build to him “Aftab Qureshi” as he guided me very honestly.
It was September 2015 when I tried to participated in DGR Lahore Ride but couldn’t make it because of unavailability of suitable bike for the ride.
I felt it so hard. So decided that I must have to participate in next ride.
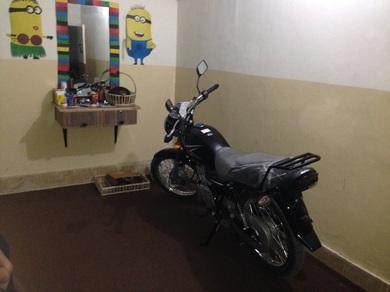
I kept on doing researches on cafe racers as it was stuck in my mind. I continued my search for a suitable bike for cafe racer project and in March 2016, finally I bought a New Suzuki GS 150 for this project.
Most of my friends were like “Don’t do it on new bike, please!“
But I decided it prior to buy this bike as I found this bike suitable for cafe racer project.
When a friend told me about the DGR and asked me to get registered and participate in the ride with him. He has a nice collection of vintage bikes which I didn’t use to like in past. I dedicate this build to him “Aftab Qureshi” as he guided me very honestly.
It was September 2015 when I tried to participated in DGR Lahore Ride but couldn’t make it because of unavailability of suitable bike for the ride.
I felt it so hard. So decided that I must have to participate in next ride.
I kept on doing researches on cafe racers as it was stuck in my mind. I continued my search for a suitable bike for cafe racer project and in March 2016, finally I bought a New Suzuki GS 150 for this project.
Most of my friends were like “Don’t do it on new bike, please!“
But I decided it prior to buy this bike as I found this bike suitable for cafe racer project.
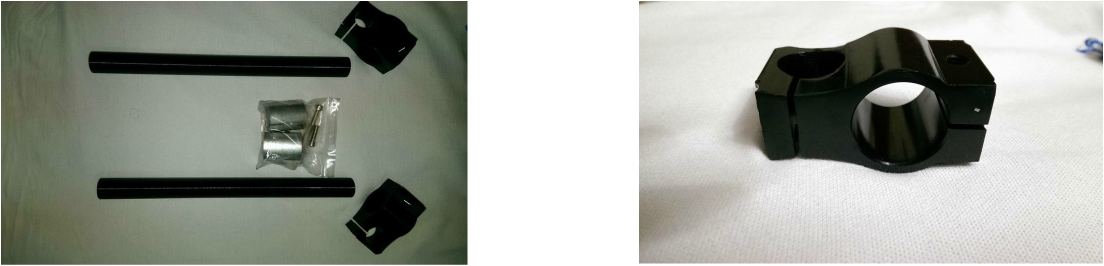
The first ever thing that I ordered was these Clip-On Handle Bars. Got it delivered from a friend from Islamabad. (BOB Customs)
Before fitting this handle I had to make holders for front light because I was going to remove the existing holders along with indicators as there was not enough room for handle to fit otherwise.
Didn’t find any kind of holders in the market So got them made by the help of a local welder, by giving him the idea that what I need and how he can make it.
Bended a straight metal strip and drilled holes in it to hold the light. And then colored it black at home.
I thought it’s a piece of cake to fit this handle in place of existing one, but believe me it was not.
It took me 3 to 4 hours to fit this handle. Got help from a local mechanic in my area.
Finally it was fitted perfectly.
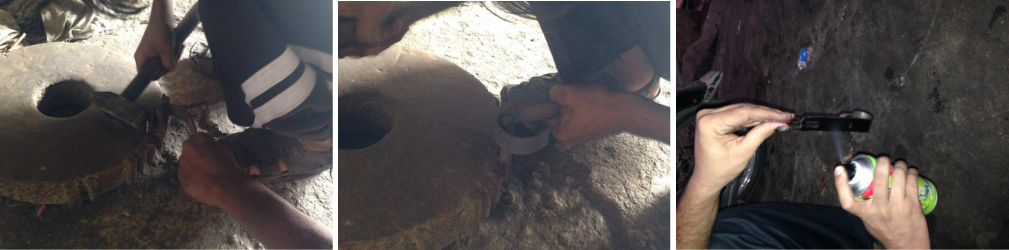
I wanted to pull up the Front shocks to give extended look above, and the Aftab Bhai said there’s no need to do this. We can simply design the bolts which can give the same look. So got these bolts designed by a local mechanic form his lathe machine after too much follow ups and visits, he finally made these bolts and they were so perfect that they got fitted by hand.

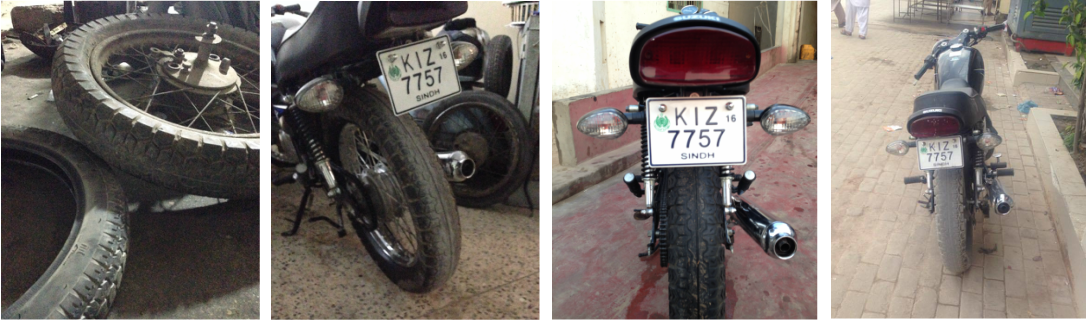
Then I moved on to tyres, and started searching for a wider tyre and again Aftab Qureshi was there to help me. He took me to his garage for a visit and there we found a spare tyre which was wide enough for me 4.00 – 18 DUNLOP.
I asked him for the tyre as I couldn’t find desired one in market, he said you can take this for the ride when you get yours you can return me.
To fit this Tyre, needed to remove chain cover and extended the double stand stopper as the tyre was wide enough. When I fitted this tyre it gave a heavy look and I was happy that I got it like cake in plate.
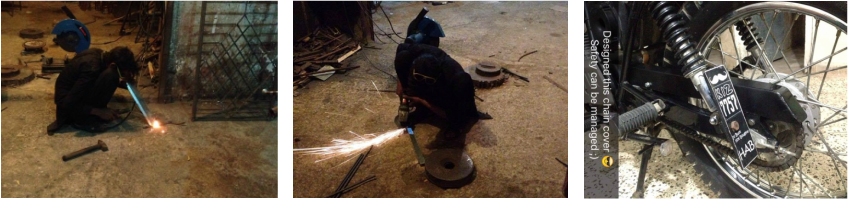
Safety is the top most priority so decided to design a chain cover first before going ahead.
It was not that difficult, took metal sheet of required length and bend it by hydraulic press and welded its end by folding to give it tapper shape.
It was not that difficult, took metal sheet of required length and bend it by hydraulic press and welded its end by folding to give it tapper shape.
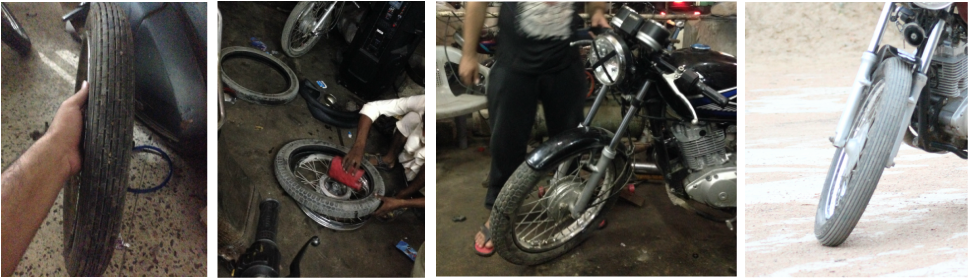
At front, I fitted 3.00 – 18 Tyre which was actually extracted from rear wheel.
After this I found front tyre wobbling too much. When I looked deep into this issue found that this rear tyre has a different pattern on it as compared to the original front tyre with straight lining.
So I changed it with a 3.00 – 18 with straight lining and the issue was resolved successfully.
After this I found front tyre wobbling too much. When I looked deep into this issue found that this rear tyre has a different pattern on it as compared to the original front tyre with straight lining.
So I changed it with a 3.00 – 18 with straight lining and the issue was resolved successfully.
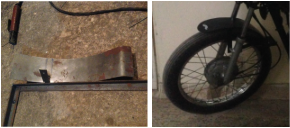
Genuine front fender was extracted out and and designed a new one just to fend little particles coming up from front by ground. It was so hard to make that welder understand how to make it, so I took hammer and started shaping it. And finally after 2-3 hours it was in this shape.
Paint job done at home then.
Paint job done at home then.
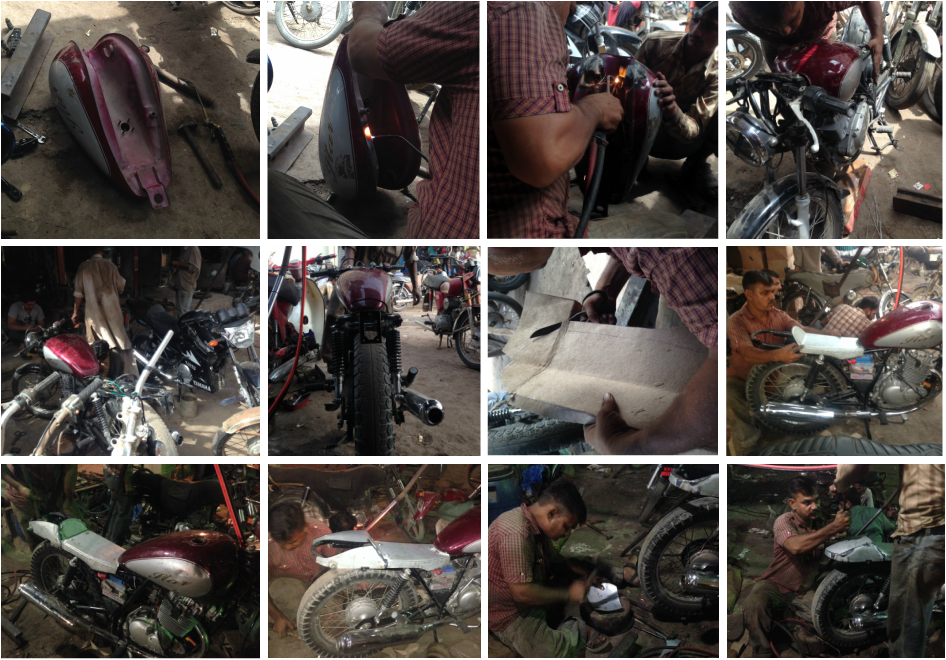
In parallel, I was looking for a wide and low profiled Fuel tank and most of people suggested me to go visit Saleem Kabaariya @ Ranchor Line.
Again I asked Aftab Qureshi for the tank and Seat Cowl. So he took me to the ranchor line at Saleem’s Scrapyard and there we found this tank. Not in much good condition but I was happy to get the desired shape.
So the Next Job was to fit this tank on this bike along with the seat cowl. Then I met a Denter and asked him to fit the tank and make a seat cowl. He gave me a date and said bring your bike I’ll make it done in a day.
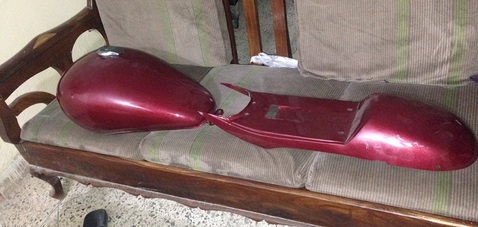
So the day finally came when the most critical job was going to be done. I clearly aligned him to not cut/Weld/Grind the original chassis/Frame even a bit. I spent consecutive 14 hours at his workshop guiding him do it this way and don’t do it. Can’t explain how hard it was to get it in this shape. Sharing my idea in photos so anyone can reapply it if anyone wants to. It wont take that much time now as everything is visible.
He done his job so perfectly without any modification to the original frame.
In parallel, he gave me seat pad so that I can get my seat done by a seat maker in the meanwhile paint job is being done.
He done his job so perfectly without any modification to the original frame.
In parallel, he gave me seat pad so that I can get my seat done by a seat maker in the meanwhile paint job is being done.
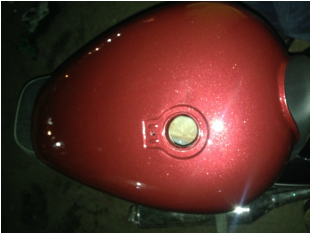
I was so confused to choose the right color for my cafe racer. My mind was stuck over metallic Blue. But that was not available in market and I was running out of time. So I took the shade book and selected Red Hiace Metallic Color.
After the paint job, It was looking actually nice than expectations. Pretty much shinier.
After the paint job, It was looking actually nice than expectations. Pretty much shinier.
|
|
Now It was the time to fit the tank and seat on this bike.
I took this tank to some mechanics to get it fit but they replied we don’t have time please go to the next one.
So I bought Tank Cap lock (Yamaha Excellence’s) and Petrol Cork (Honda 125’s) as its genuine cork couldn’t fit into this tank, personally fitted them at home. It was not that much difficult.
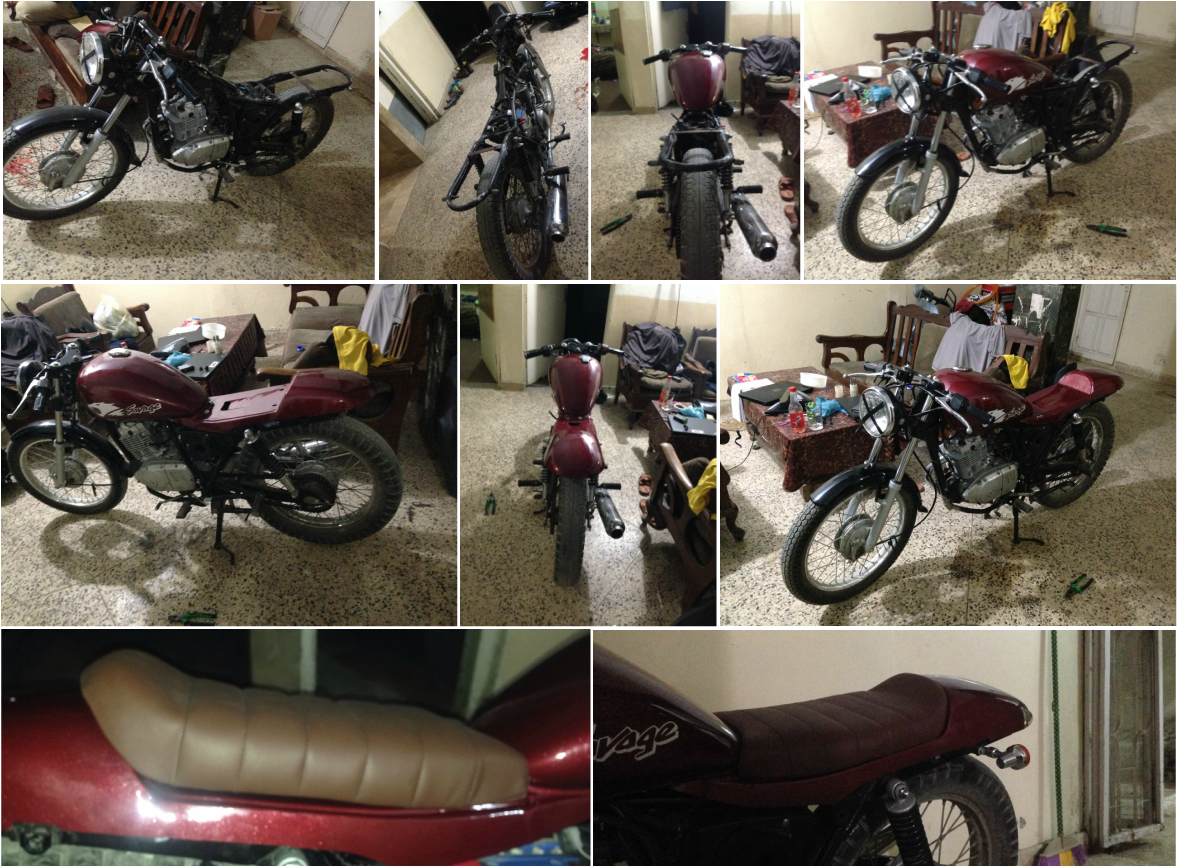
Then I started stripping off my bike and fitted Tank and Seat cowl on it. Seat cushion was too much thick when I fitted it so decided to remake it. And got it remade by the seat maker.

Got some spare leather from the seat maker for side bag as he refused to make side bag so I decided to make it by myself.
I don’t have sewing machine here as I’m living stag here, so I made it with a needle and thread.
It took me almost 4 consecutive hours to get this bag made finally.
Wrapped rest of it on grips and levers.
I don’t have sewing machine here as I’m living stag here, so I made it with a needle and thread.
It took me almost 4 consecutive hours to get this bag made finally.
Wrapped rest of it on grips and levers.
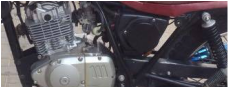
On the other side, Air filter Intake point was not covered. So to protect it against heavy dust on my route, designed a Cover for it to balance the Air intake and fend the dust to go inside directly as well.
When it came to exhaust, It was too hard to select one out of hundreds available in the market.
Approached a lot of suppliers and shops, got feedbacks positive and negative for different exhausts.
Once I decided to get it made by Waqar Engineering , I heard about his good work, but workshop was far away so couldn’t visit it.
Later one day, I was looking for Exhaust bend in orangzaib market and I found this beauty. So decided to bought it, and after a little negotiation I finally bought it. Bend was not available in the market so got a used full exhaust and cut it from bend to use it.

And got this exhaust fitted from a fitter at jublee.
Believe me, Its sound was so heavy. I was not expecting this much heavy sound from a little single cylinder engine. Its amazing!
Ordered Exhaust wrap online and got it delivered. Wrapped it at home by help of a friend.
Believe me, Its sound was so heavy. I was not expecting this much heavy sound from a little single cylinder engine. Its amazing!
Ordered Exhaust wrap online and got it delivered. Wrapped it at home by help of a friend.
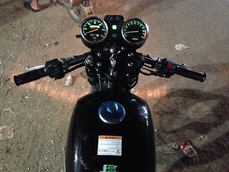
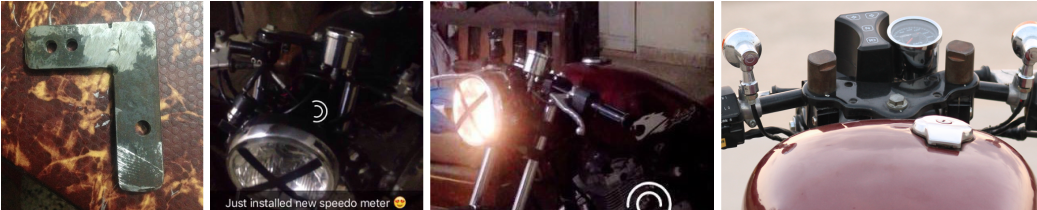
As the genuine Speedo meter and RPM meter was extracted out, So I was looking for some smaller ones to install over it as GS genuine ones are bigger.
Got this speedo meter from the market, found this size ideal. Unfortunately couldn’t found RPM meter for same size and shape. So decided to fit Light indications beside this speedo meter.
Designed this strip to fit it. And finally it was giving this look.
Got this speedo meter from the market, found this size ideal. Unfortunately couldn’t found RPM meter for same size and shape. So decided to fit Light indications beside this speedo meter.
Designed this strip to fit it. And finally it was giving this look.
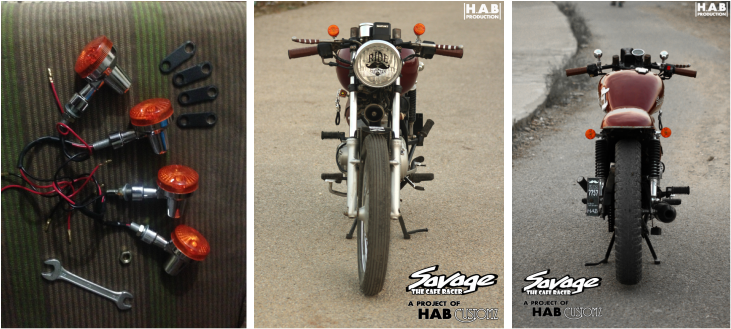
Same for the indicators, smaller ones. Designed these holders for each. Rear indicators were installed at the same position as genuine. But I thought to go out of the box for front indicators. And yes, here I go. Installed them over mirrors location with the help of same holders. They didn’t came with indicators.
Designed them personally as they were derived by the idea.
Designed them personally as they were derived by the idea.
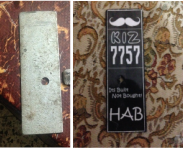
For License plate, designed this to hold the plate. Took a metal strip, a thicker one and painted it down.
Designed it in PS, printed and pasted.
Designed it in PS, printed and pasted.
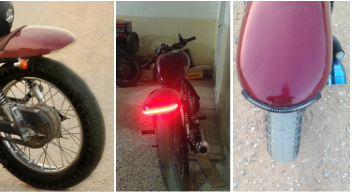
For Back light, Got LED lights strip in red and pasted it over the edge of Seat cowl. Which was giving a very nice look over night but an ugly look in daylight. So replaced it later with this branded tail light which was ordered online.
That's pretty much it! :)
Visit My FB page for More HD Photos.
Click on button below to access it.
Click on button below to access it.
